Gold Foil Wedding Invites: Part I
A few months ago my lovely cousin, deep into planning her nuptials, texted me asking for some wedding invitation design suggestions. Among the names I gave her of professional designer friends and minted.com etc, I offered up the idea that I could also design them for her and her fiancé, helping invite all of their guests to their event with a completely custom designed invite, truly tailored to them. To my surprise they ACTUALLY decided to trust me with this huge task and so I set about designing something that would compliment their wedding's style. Turns out, designing the invites was the easy part....
Once we had the design nailed down, it was a matter of "how do we actually make these?". And like most DIY projects I've embarked on, I turned to Pinterest for answers. By combining tactile and material ideas from different articles, blog posts, and another cousin's success with DIY bridal shower invites, I figured out each piece and designed a wedding invitation suite that fits this couple better than the options they were finding online-- AND for half the cost!
I've broken it out into two posts so that you can follow along and make your own DIY gold foil on vellum invitations! This Post One is directions for the main invitation and gold foiling process. Post Two is about the RSVP, Map and Details cards and how it all comes together...
The final designed wedding invitation suite:

You Will Need:

Bristol paper 8.5x11"
Vellum paper 30lb 8.5x11"
Scrap paper 8.5x11" (uncoated)
A1 envelopes (small ones for the response cards)
Inkjet printer (what most people have at home)
Laser printer (or access to one)
Minc Foil Applicator by Heidi Swapp (12" not the 6"!!)
Scissors
X-acto knife and extra blades
metal edged ruler
Main Invitation:
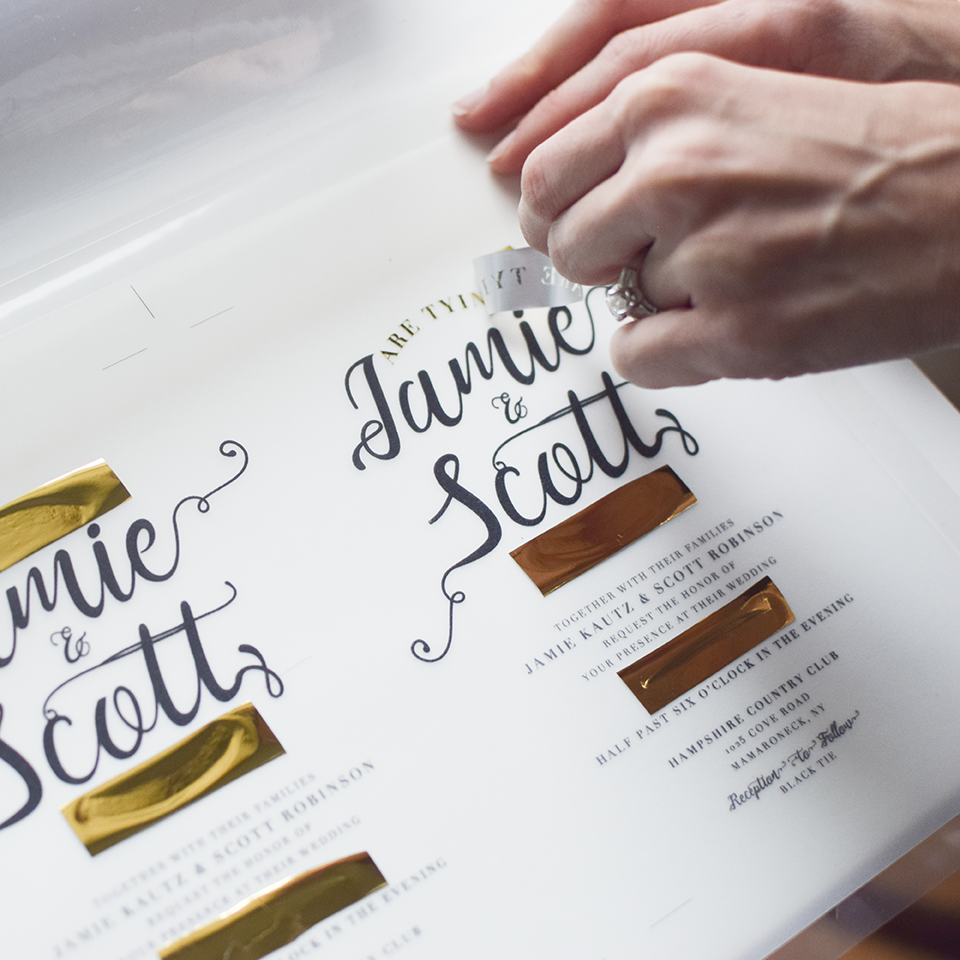
For a sophisticated design, we decided on a bristol board backer-card, printed with a white marble texture, then overlaid with a vellum sheet containing all the information. For a hint of gold, we chose three lines of text that would be gold-foiled on the vellum. I initially contacted some local printers about doing the foiling, but after receiving some insanely expensive estimates, decided to embark on doing it myself and we were SO happy with the results!
I used my own photo of a marble texture and just printed it at home using my trusty Canon inkjet! So easy. The bristol board went through with no issues and the ink took to the heavyweight paper really nicely. I cut out two 5x7" cards from one 8.5x11" Bristol paper sheet by hand (I'm a perfectionist with an x-acto knife).
I then printed the vellum invitation on a LASER printer and, again, one 8.5x11" sheet yielded two 5x7" invites. To connect the vellum to the bristol board, I found these delicate gold brads that worked perfectly to tie the two elements together...AFTER we gold-foiled them.
Gold Foil Application Process:
A couple of time-saving pro tips before starting the foil application:
MOST IMPORTANT: The vellum sheets MUST BE PRINTED ON A LASER PRINTER. The Minc foil machine will only adhere foil to elements printed with TONER on a laser printer.
When printing the vellum sheets, print the lines of type that will be gold-foiled in a gold color so that when applying the foil, any tricky spots that didn't transfer wont stand out as black. Sneaky :)
Printing two 5x7" invites up on one 8.5x11" vellum sheet helped make the process 2x as fast.
Pre-cut a bunch of gold foil strips that will fit the areas you want foil applied to. This will save A LOT of time in the long run, and if you have someone helping you, assembly-line that shit!
Add a sheet of cotton scrap paper between the foil sheets and the top layer of your transfer folder. This helped keep the toner on the vellum from sticking to and ruining the folders. Make sure the paper you use as the protective sheet is uncoated so it won't stick too!
With scissors, cut the transfer folders down, closer to the size of the 8.5 x 11" vellum. This will feed through the Minc much faster and reduces the chances of the foil strips slipping while handling the large, bulk folder.
Don't let the folder and contents sit after it comes through the Minc. The longer it sits, the more the heated toner on the vellum sticks to the paper protector and is harder to get off. We found it best to take the foil off right away.
Now for the fun part!
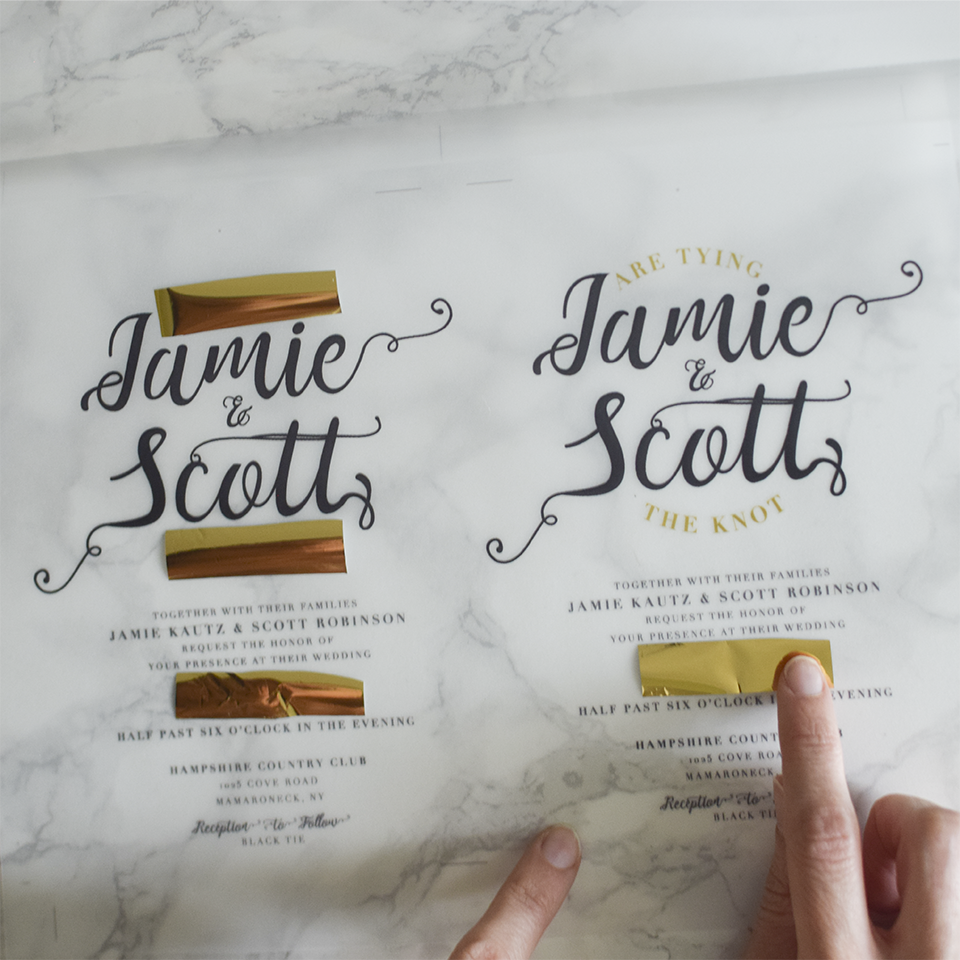
One: apply foil
Lay your vellum sheet in the open transfer folder. Then, FOIL SIDE UP, place your pre-cut strips to fit the specific areas where you want the foil to be applied. Take care to make sure the foil isn't touching any elements that you do not want the foil to be applied to.

Two: paper protector
Carefully lay a sheet of scrap cotton paper over the foil and vellum sheet. This will help keep the foil in place and protect your transfer folder from getting ruined by the heated ink.
Three: close folder
Carefully close the transfer folder, sandwiching your vellum sheet, foil strips and paper protector inside. Smooth it down with your hands.


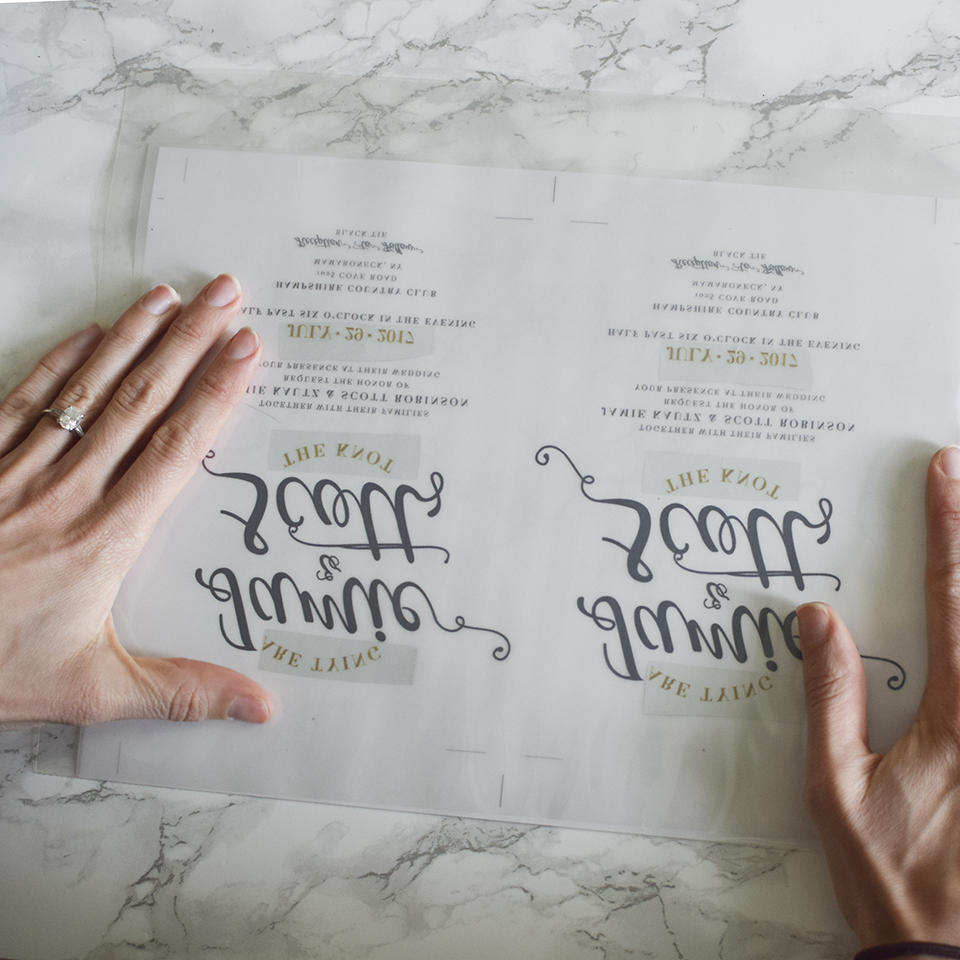
Four: roll over
VERY carefully roll your transfer folder and its contents over so that you can see through the underside of your vellum sheet and fix any foil strips that may have shifted position.
Five: check point
Check that your foil strips haven't shifted on to any elements that don't get foil. This is the trickiest part of the process! Stick with it, it is SO worth it and you'll get the hang of it after doing a few (or 110).
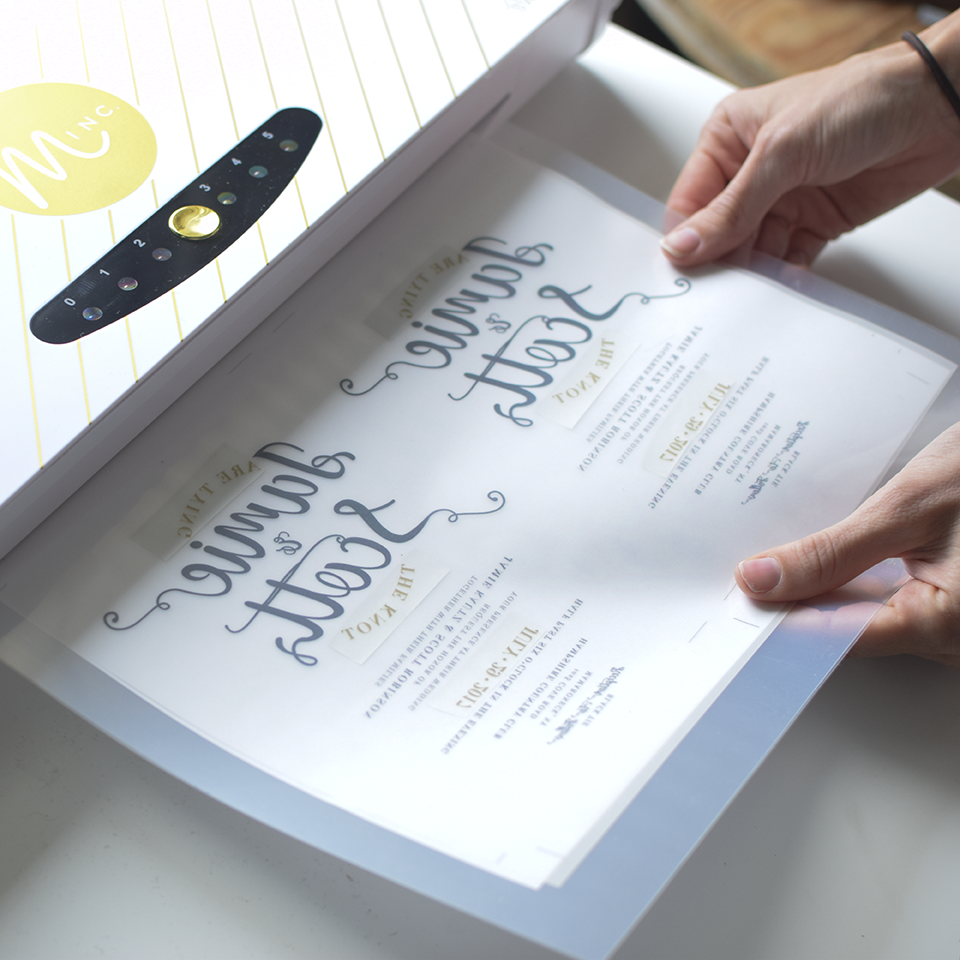
Six: feed into Minc
from the top of the transfer folder, begin feeding it into the Minc. The rollers will grab it and continue feeding it through for you. So easy!
Seven: reveal
When the folder comes out the other side of the Minc, open your folder right away and peel off the protective paper to reveal your vellum and strips that are now stuck to it (this is good).
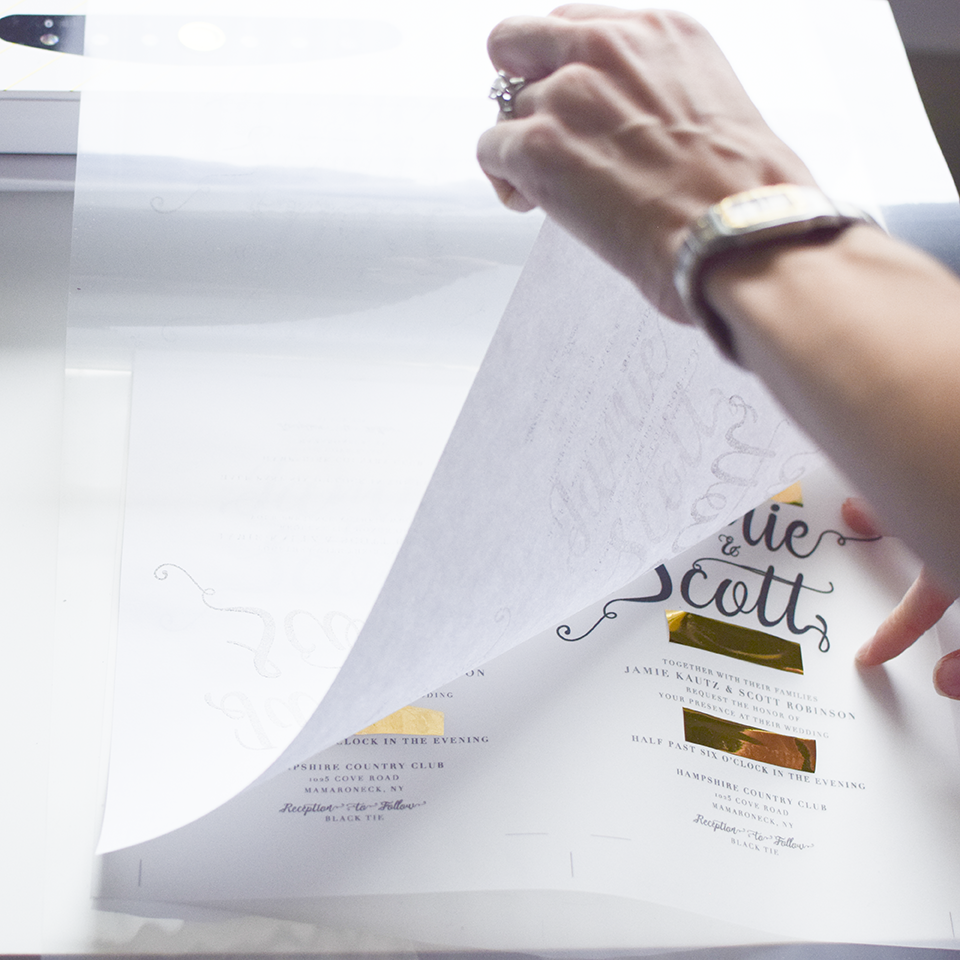
Eight: peel it off
Finally! Peel off each strip of foil paper and see how it has transferred magically on to your vellum sheet!
Nine: admire your work!
Oooohhh so shineyyyy. One down...109 to go.
Final verdict:
Looks complicated...but is really very simple and easy (and fun!) to do. After a little trial and error, you will easily have your set of beautiful gold foil invitations and the satisfaction of having done it all yourself!
Have you done this foil process or used the Heidi Swapp foiler to make invites? Any tips you have to share would be greatly appreciated for future projects :)
